So, what does one do when her ADD booties are too long? Turn them into Franken-ADD booties, of course! Well, not quite, but I still cut into them and put them together, so it counts. While its not really a tutorial, I documented my process extensively, so I could share it, because I'm quite proud of my fixing of them!
The first part of the process involves research. TECHknitter has a very good article on how to fix knitting that it is either too long, or too short. This method is a lot simpler if you have stockinette instead of garter stitch, due to the geometry of the stitches (which I'm not even going to attempt to explain, she does a much better job).
However, shortening a piece of garter, although off by half a stitch, it's really like grafting two garter stitch pieces together, right? Cue for Theresa, of Techniques with Theresa fame. Her Knitty article on grafting is very good, and is what finally taught me to graft. However, in this case, the appropriate section is almost a throwaway comment at the end about how to graft garter.
With my newly gained knowledge and my tools, I set on to work.
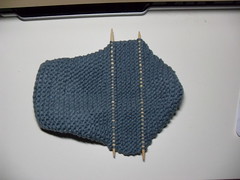
First I decided that I wanted to get rid of 5 double lumps. Because the grafting would effectively add an extra lump, I picked up stitches so that there would be 6 lumps in the middle, with one to be created later (6-1=5!) I picked up the stitches as Theresa said: the stitches from the front have the purl bumps against them, and the stitches at the back have the knit stitches against them, as you can see in the picture.
Snip, snip!


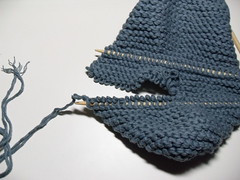
Unravelling garter stitch is actually a bit complicated, as you can't really just rip. At every edge, the yarn wraps around itself, so you have to pass it through. Otherwise it kind of stops and the end!
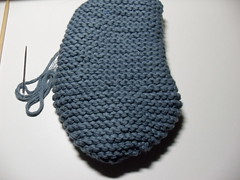
And now, the grafting. The set up stitches are purl front (leave), purl front (leave). And then knit front drop, purl front leave; knit back drop, knit back leave.
I didn't look like much, I thought it was going to be a disaster and would have to reknit them.

However, tightening up the yarn yielded wonders.

At the end, I couldn't even tell where I had worked on it.
The edges are, as previously advertised, off by half a stitch, but I don't think it's really visible. Just in case, I did the snipping on the same place in the other slipper, just so they could be symmetrical.
And now I have booties! (at time of picture, booties don't have the slipper soles I got them, but I just want to wear them, dammit, it can wait!)


No comments:
Post a Comment